Video is an indispensable part of your marketing strategy in 2023. After giving you a few tips on what equipment to use to create videos for your social networks, here are Solid Rusk’s 5 tips to help you get started with video editing, and master the basics of video editing.
Video editing is a crucial step in the creation of captivating visual content. With these tips, you’ll have everything you need to get started.
Sommaire
The key to successful assembly: organization
Organizing your data is the key to successful editing.
Good organization guarantees smooth, efficient editing. As an experienced editor, here are our two top tips:
- If you have a slow computer, we recommend that you work on an external hard drive, preferably an SSD, and store all your data on it. To avoid slowing down your computer, be sure to set up project creation on the external hard drive, and work directly on this version. This will avoid the slowdowns and jerks often encountered with internal hard disks. It also frees up space on your main computer, allowing your editing software to work at its best.
- To ensure that your work runs smoothly, it’s essential to organize your rushes by day of shooting, thus maintaining a chronological order (day 1, day 2, etc.). Within these files, create sub-folders carefully labeled according to their source (camera 1, camera 2, sound, b-roll). This will help you to navigate more easily during editing and avoid getting lost in a multitude of mixed files.
Create as many timelines as you need
For optimal organization, we recommend creating several sequences (or timelines), offering considerable editing flexibility. If your project involves interviews, we recommend that you dedicate a timeline to all these sequences. This makes it easier to unshoot and organize each interview.
In the case of several interviewers, dedicate a timeline to each of them, then, once everything is ready, proceed with the de-rushing of each interviewer in their respective sequences.
Then add a timeline (sequence) for the B-Rolls that will illustrate the speakers’ pitches. Having a dedicated timeline means you’ll always have these complementary sequences at hand.
With all these sequences ready, you can now start editing by creating a final timeline (the final film) for which you can draw images from each of the timelines created beforehand.
It’s when you work on the final editing sequence that you really begin to give your montage a soul.
Remember to have a dynamic intro/outro
The introduction and conclusion of your video are crucial elements of your video. Where a good, dynamic introduction holds the viewer’s attention and encourages them to continue reading your video, an impactful conclusion convinces them to take action (share the video, buy your product, subscribe, etc.).
We therefore advise you to opt for dynamic titling that captures attention from the very first seconds, and reflects the tone and style of your content.
There are sites where you can buy ready-to-use animated titles that can have a real impact on your video and add a professional touch to your productions.
Take a look at https://videohive.net/ to find what you’re looking for.
Where can I find royalty-free music for my videos?
Music is a fundamental element in creating an immersive atmosphere and moving the audience with your video. Make sure you use royalty-free music that perfectly matches the soul of your video. Our expert, Julien, has put together a selection of reference sites offering a choice of suitable music.
The https://artlist.com site offers a wide choice of music of all kinds for all types of content. The only drawback is that you need to subscribe to access the library.
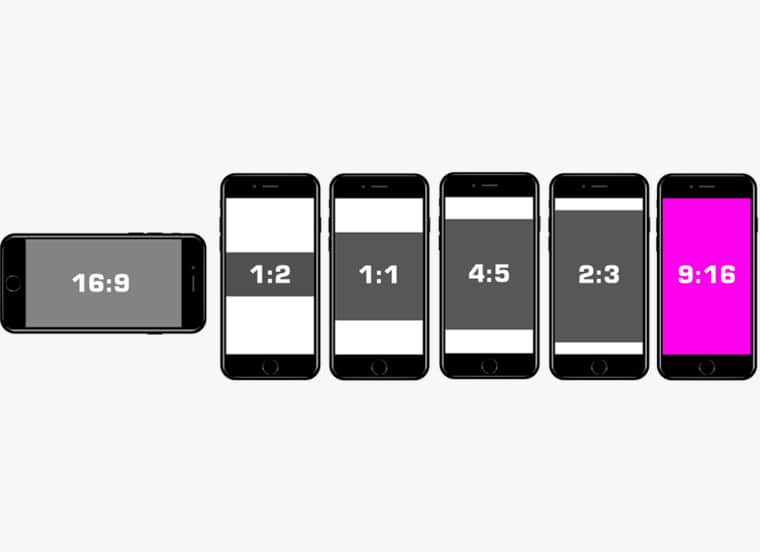
Which export format for social networks?
When it comes to exporting, it’s essential to configure the settings according to the platform on which your video will be published.
For example, export settings for Instagram differ from those for YouTube. Be vigilant in this respect and make sure you adapt your settings accordingly.
Each platform has its own format, resolution and compression requirements.
The rule of thumb is 9:16, i.e. 720 x 1280 px.
If you prefer landscape mode for TV commercials, you’ll need 16:9, i.e. a size of 1,280 x 720 px.
I recommend two different formats: .mov or .mp4.
Historically, Instagram offers a 600 x 600 px square format, also valid for your videos. You can also use a vertical format of 600 x 750 px in the feed.
Be careful with the length of your video, which must not exceed 60 seconds.
Make sure you configure your export settings correctly to guarantee optimum quality when publishing.
By following these five essential tips, you’ll be able to bring your video projects to life with captivating, professional editing. But good editing isn’t everything! Check out Solid Rusk’s other tips for making a great video.
Article written by Emeline l Prête-moi ta plume